How To Use Your Ruffler Foot
Lately, quite a few people have asked me all sorts of questions about ruffler foot: how the ruffler works, how to use it, what sort of ruffler they need, the differences between the different rufflers, and whether the ruffler they have in mind will fit their machine. The list goes on…..
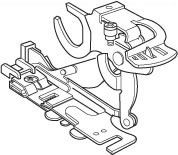 Seeing that I’m still working on my own tutorials (which will be hosted on my own YouTube channel – woohoo!!), here’s a quick guide I put together – using found resources powered by Google – to give you an overview on ruffler foot – hopfully it will get you happily ruffling for the time being
 ![]()
Ok, let’s get started:
What Sort of Ruffler is right for my machine?
First, consider the “Shank Height” of your machine, because there are TWO variations:
Low Shank & High Shank - what’s the difference?
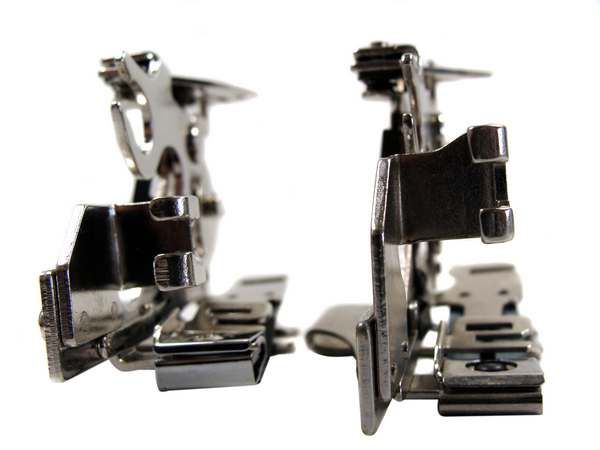
Low Shank Ruffler High Shank Ruffler
Most domestic machines have LOW shanks. Just to give you an idea, we sell about 10 low shank presser feet to ONE high shank foot.
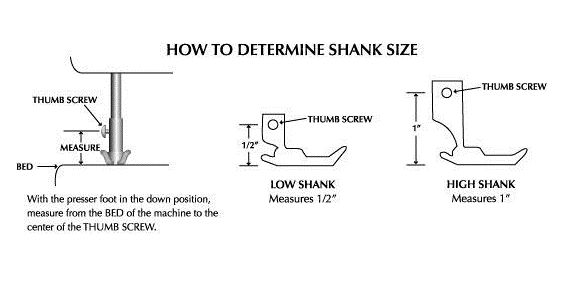
That means if you don’t know what sort of shank your machine has, it’s probably a low shank. Because High Shank machines are generally “fancy” embroidery models which are more costly, and those who invest in these models tend to know exactly what shank type it is.
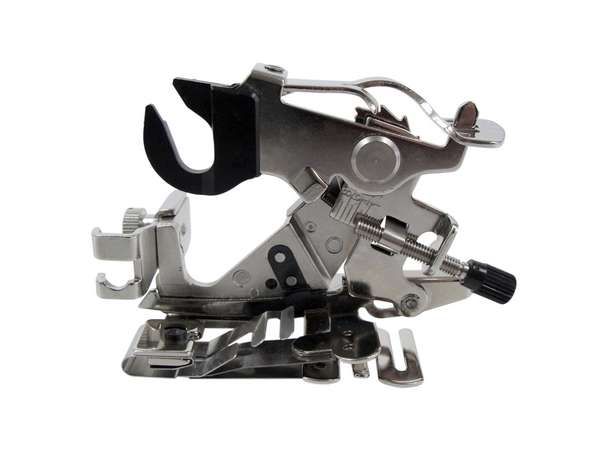
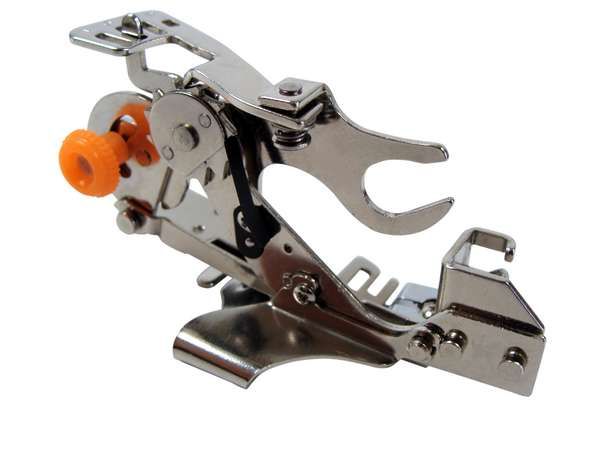
The next decision is which low shank ruffler to go with?
There are TWO types:
The Ultimate or The Regular - what’s the difference?
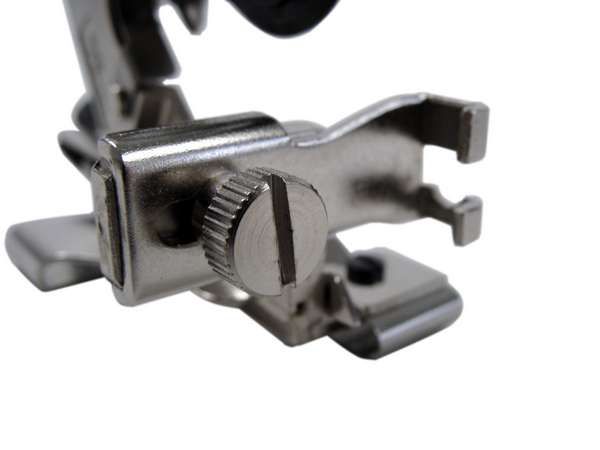 Apart from a few cosmetic or design differences, the only REAL difference is Ultimate Rufflers have an extra adjustment.
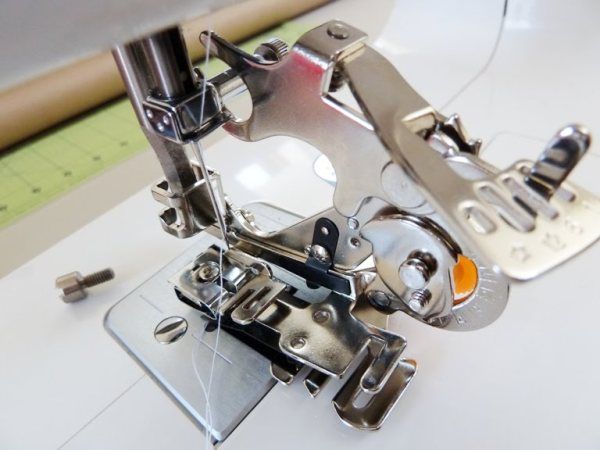
Take a closer look (see pic on the right),
you will see one adjustable screw or “dial”.
As you loosen the screw or “dial” in or out, you will be able to slide the whole foot left or right.
This is where you get to adjust your foot in relation to your needle position to allow your ruffler foot clearance (so that your needle does not hit any part of the ruffler).
This is only necessary if you have an unusual machine that has a unique needle position which cannot be changed.
This tends to apply only to really basic, budget machines which has little or no needle position adjustments (this is very rare). Or older, more obscure makes and models.
For most people, there is NO need to go for the ultimate – I’ve tested BOTH rufflers and they are functionally identical.
To attach your ruffler on to your sewing machine
First of all you need to remove TWO things:
- Whatever foot you’ve got on your machine right now
- The Presser Foot Adaptor (sometimes referred to as “Foot Holder”).
![]()
Almost all of the feet that came with your sewing machine will be the “Snap-On” type (such as the Satin Stitch / ZigZag Foot, Overedge Foot and our Quarter 1/4 inch Foot) as opposed to the “Screw-On” type (your Walking Foot, Darning Foot and Binding Foot belongs to this group, so is your ruffler).
Before you do anything, turn the hand wheel towards you to bring the needle to its highest position (see Figure 4 in diagram below).
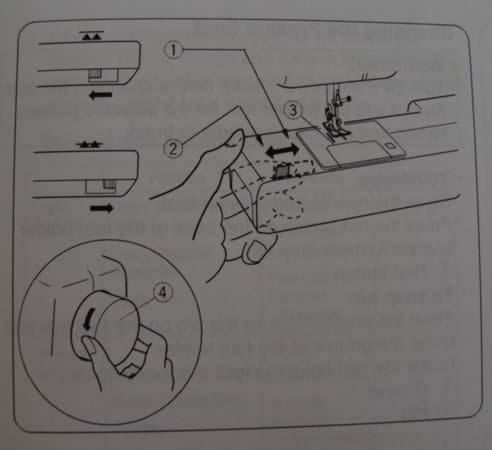
Next you also need to raise your presser foot, so that it is AWAY from the metal plate (see diagram below, but don’t worry too much about the numbers).
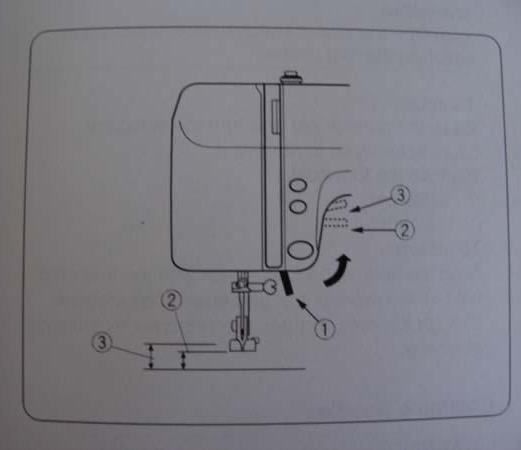
To remove the snap-on presser foot, push the presser foot release – a RED button or a lever – located behind the presser foot adaptor.
The presser foot will come off. Now be sure to put this foot in a safe spot so you know where to find it later….
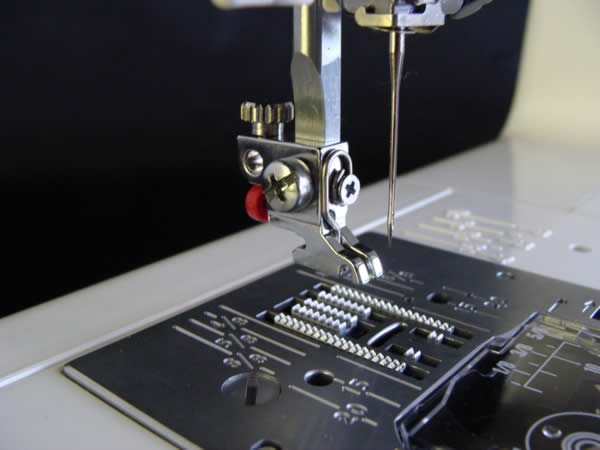
Using a screwdriver (the one that comes with your machine is fine) to undo that set screw on the side of the Foot Adaptor (see diagram below)
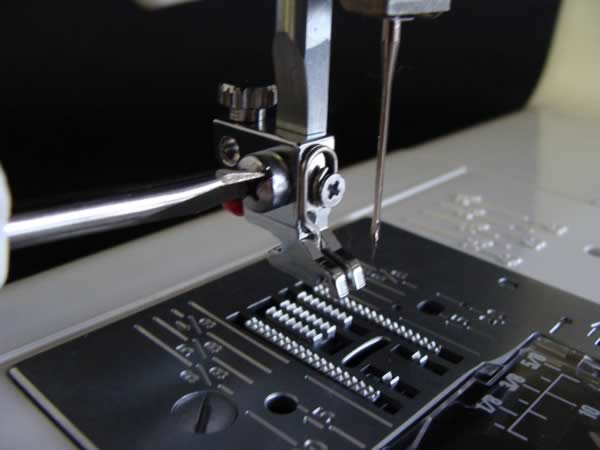
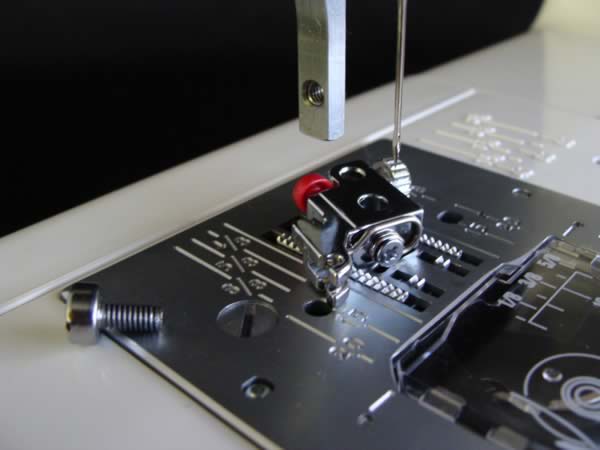
If your machine is brand new, and this is the first time you’ve tried to undo the screw, it will be fairly tight…..
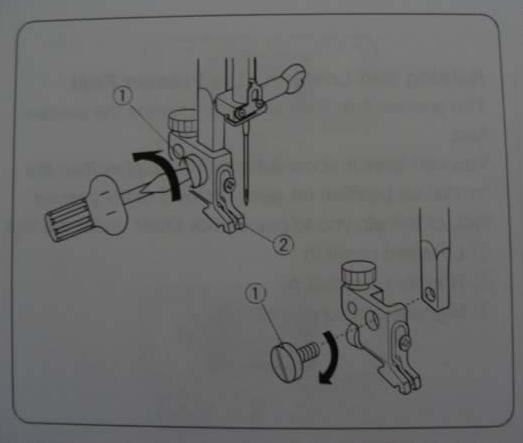
Expect to use a bit of elbow grease and patience but NEVER use blunt force, because you don’t want to damage the thread on the screw.
If you have a magnetic screwdriver
- the sort that will grab hold of your screw – it will make this job easier.
Remove the Foot Adaptor from your vertical presser bar
(commonly know as “shank”, and sometimes called “the stem”)
and keep it in a safe place. You will need it to attach other feet.
![]()
DO NOT lose your Presser Foot Adaptor….
Because you NEED it to attach your snap-on feet back on your machine. BUT if you happen to lose it, Don’t Stress – we have some spares in stock.
Put the little set screw somewhere Safe and Handy! You will need it again in a minute.
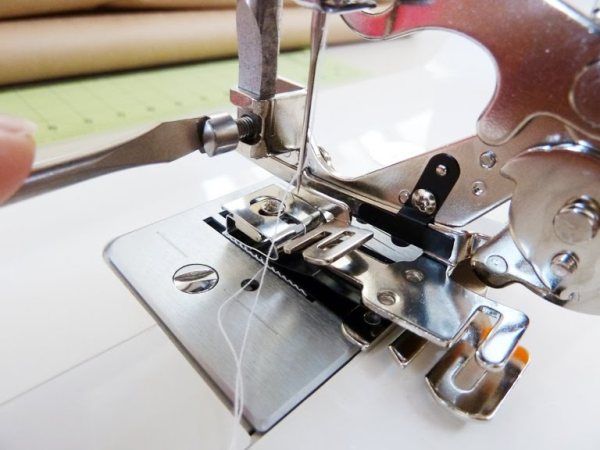
Now, your machine will now look something like this:
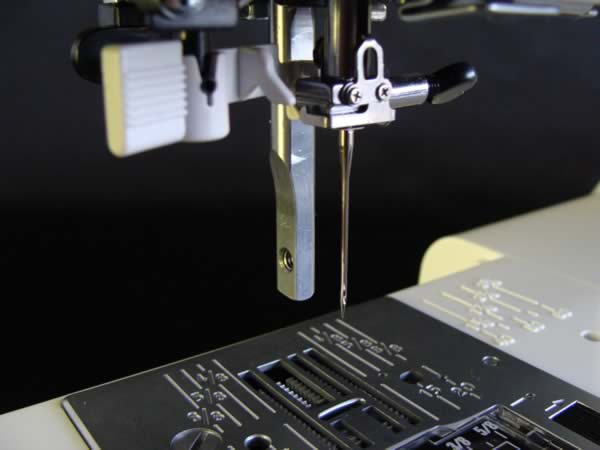
Now, To attach the Ruffler:
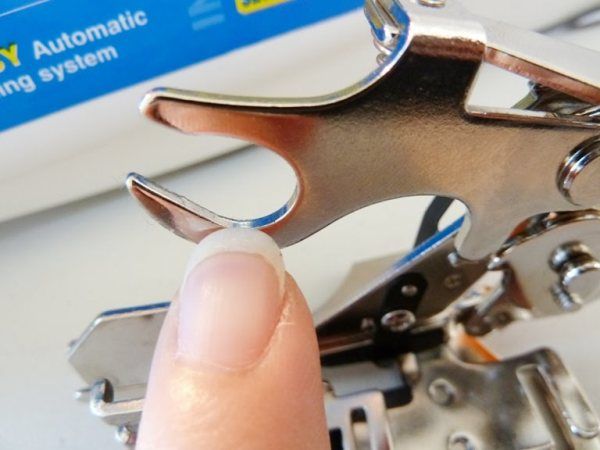
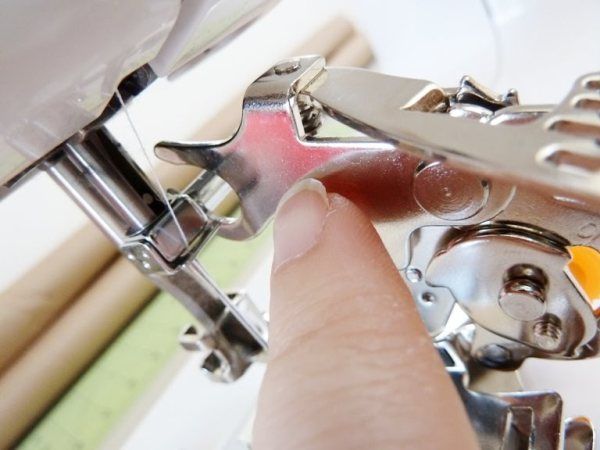
First find the U hook, also known as a “Fork Arm”.
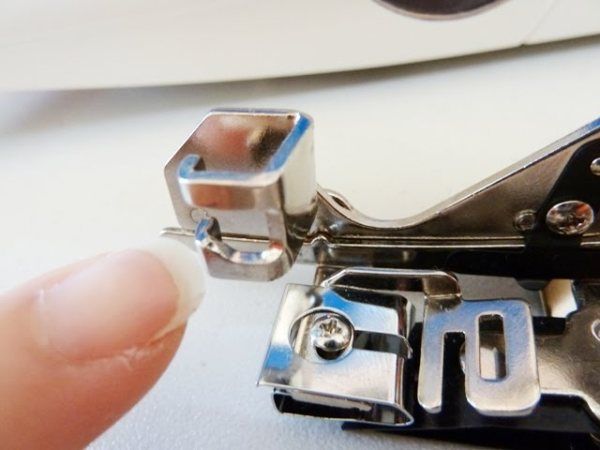
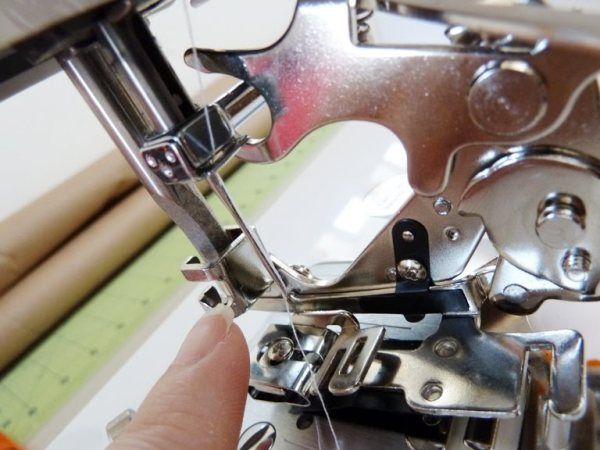
This is the part of your ruffler foot that MUST go around the Needle Clamp (i.e. that horizontal bar thing that holds your needle in place). Making sure the top prong of the Fork Arm is ABOVE the Needle Clamp.
Now, see that “claw” thing with two prongs? That’s the part that holds onto your shank (aka vertical presser bar), where the screw goes back in (between the two prongs) and fasten the whole foot onto the shank.
Let’s put it in place. And move your wheel – slowly – up or down, to align the screw hole between the two prongs.
Make sure your Fork Arm (or U Hook) is still in place, surrounding the Needle Clamp. This is VERY important, because the up-and-down movement of your needle bar is what “drives” your ruffler.
Now, put your screw in and tighten with the screwdriver. Making sure your ruffler foot is nice and securely attached.
Yay! Your ruffler foot is ready for action.
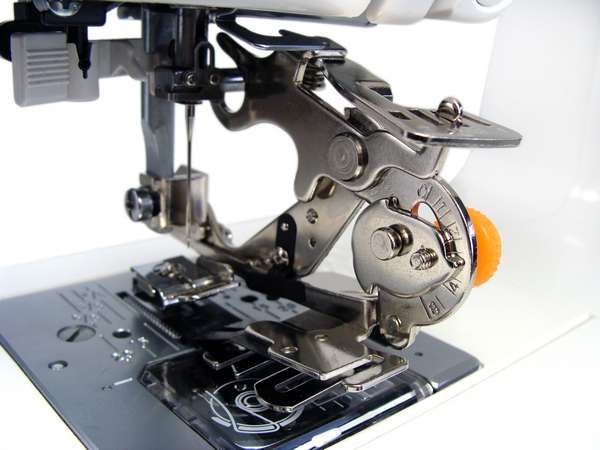
Now, be kind to yourself and have patience as you try to get the hang of mastering this “foot-on, foot-off” action on a regular basis.
Next, see the Ruffler Foot in Action!
While it might seem a bit fiddly to start with, this process does become easier – most of my customers have found the above information useful, and they are all happily ruffling away now ![]()
As always, please feel free to ask me any time you feel stuck. I am happy to walk you through this process so you can get going with the fun part…..
Happy Ruffling!!
xoxox
P.S. Looking for a Ruffler for your machine?
Take a look at our store HERE and grab yourself a new ruffler foot today!
P.P.S. And, if you’d like to discover more about the various types of presser feet (and an overview of what they do), have a look at this one:
A Quick Guide to Your Sewing Machine Presser Feet
And if you’d like to learn some “Behind the Scene” Secrets, Read THIS :
Not All Presser Feet Are Made Equal
P.P.P.S. Still want more? Here's a FREE Comprehensive eBook for you:
Download it Now - it's yours.
You'll find heaps of useful (yet non-boring) information to actually help you sew easier (with less unpicking) - no matter where you are in your sewing journey :-)
Enjoy!
Thanks for this it will make doing ruffles a lot easier as have been frightened to use one as they look so complicated.
- Tracey

